

Summary: This guide walks you through the steps to upload and download ISO images on your Proxmox VE server. Easily manage your virtual machine installations by learning how to source ISO files and efficiently upload them to your Proxmox environment. Ideal for Linux users and system administrators, this tutorial ensures a seamless setup process.
How to Upload and Download ISO Images on Proxmox VE Server
Most operating systems provide their installer programs in the form of ISO image files. To install an operating system on a Proxmox VE virtual machine, you’ll need to use the ISO image of your chosen OS, which can be downloaded from its official website and uploaded to your Proxmox VE server.
The Proxmox VE storage that supports ISO image files includes a dedicated section for ISO Images, where users can upload and manage ISO files easily.
Table of Contents
- Uploading an ISO Image to Proxmox VE Server
- Downloading an ISO Image on Proxmox VE Server using URL
- Conclusion
Uploading an ISO Image to Proxmox VE Server
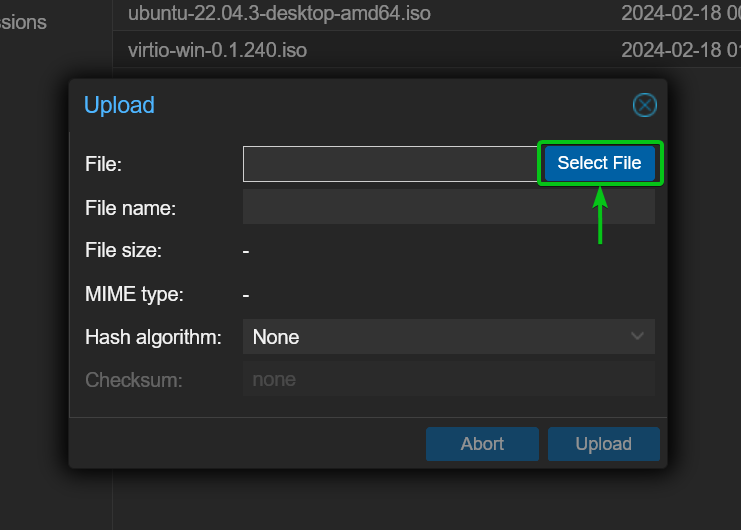
To upload an ISO image to your Proxmox VE server, navigate to the ISO Images section within the Proxmox VE web management UI and click on Upload.
In the Upload window, select Select File.
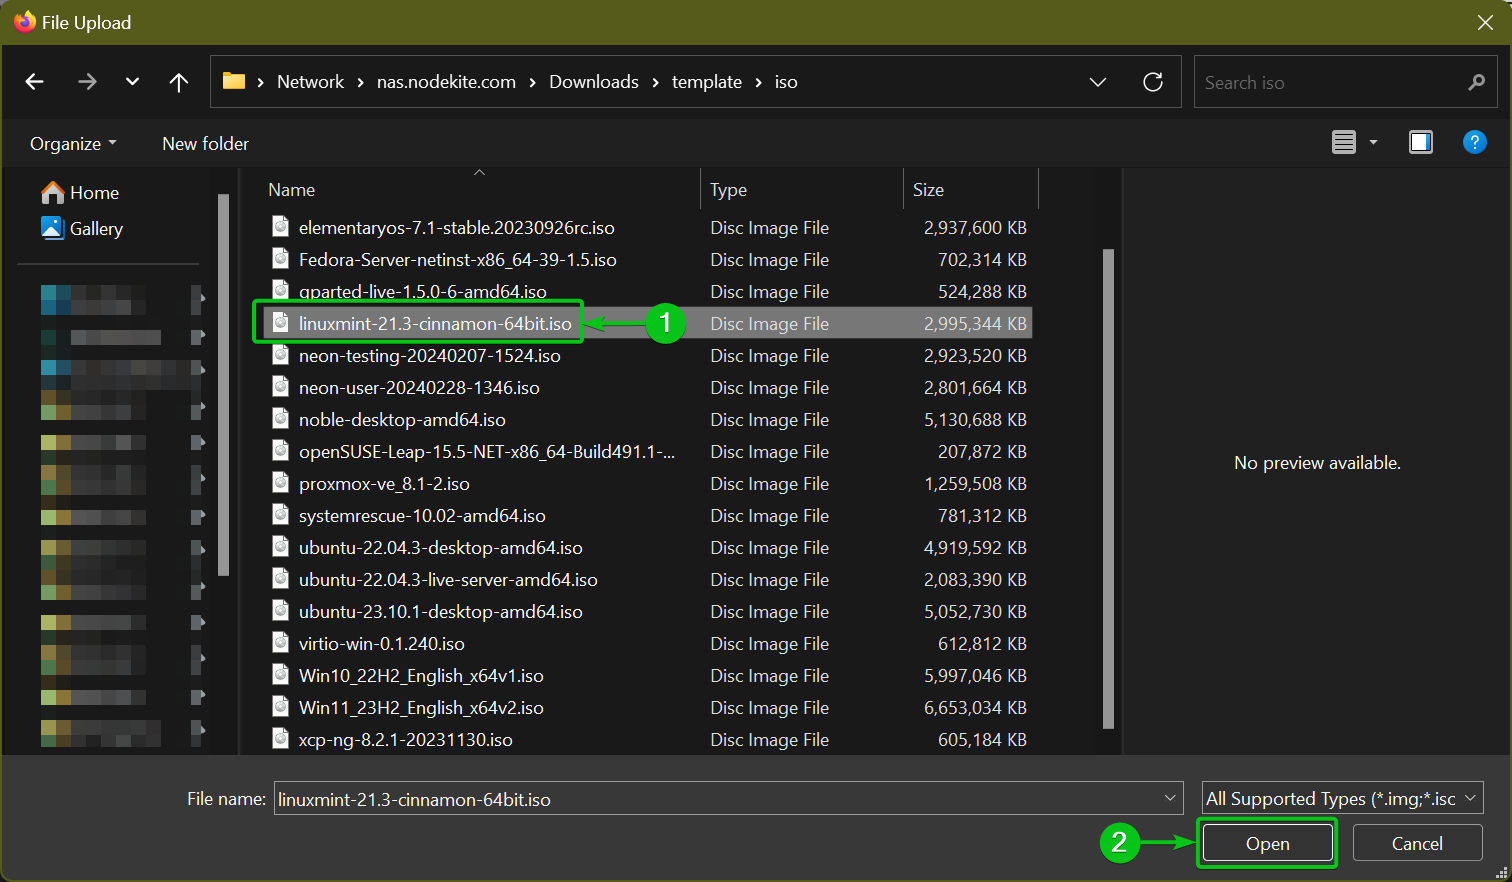
Choose the desired ISO image file from your computer’s storage and click on Open.
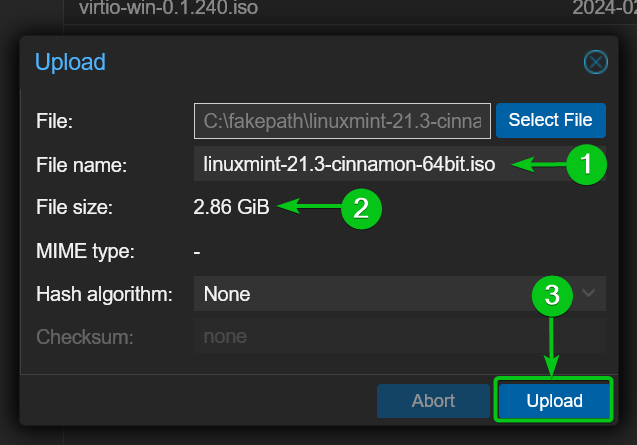
Your selected ISO file will be displayed in the File name section. You can rename it if desired before proceeding to upload.
Click on Upload to start the upload process.
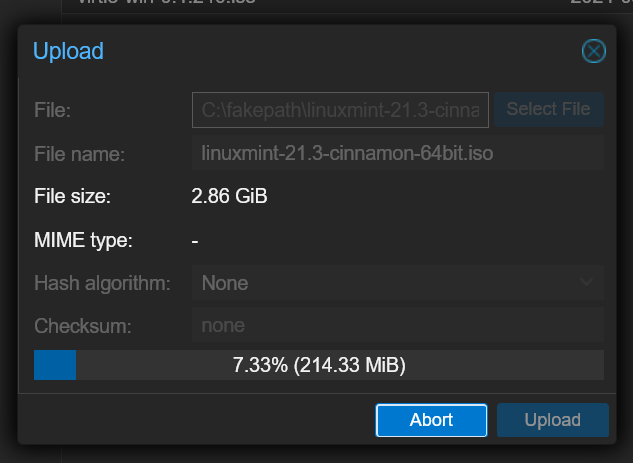
Wait a few moments while the ISO image uploads. You can cancel the upload at any time by clicking on Abort.
Once the upload completes, you will see a confirmation message. Close this window to finish.
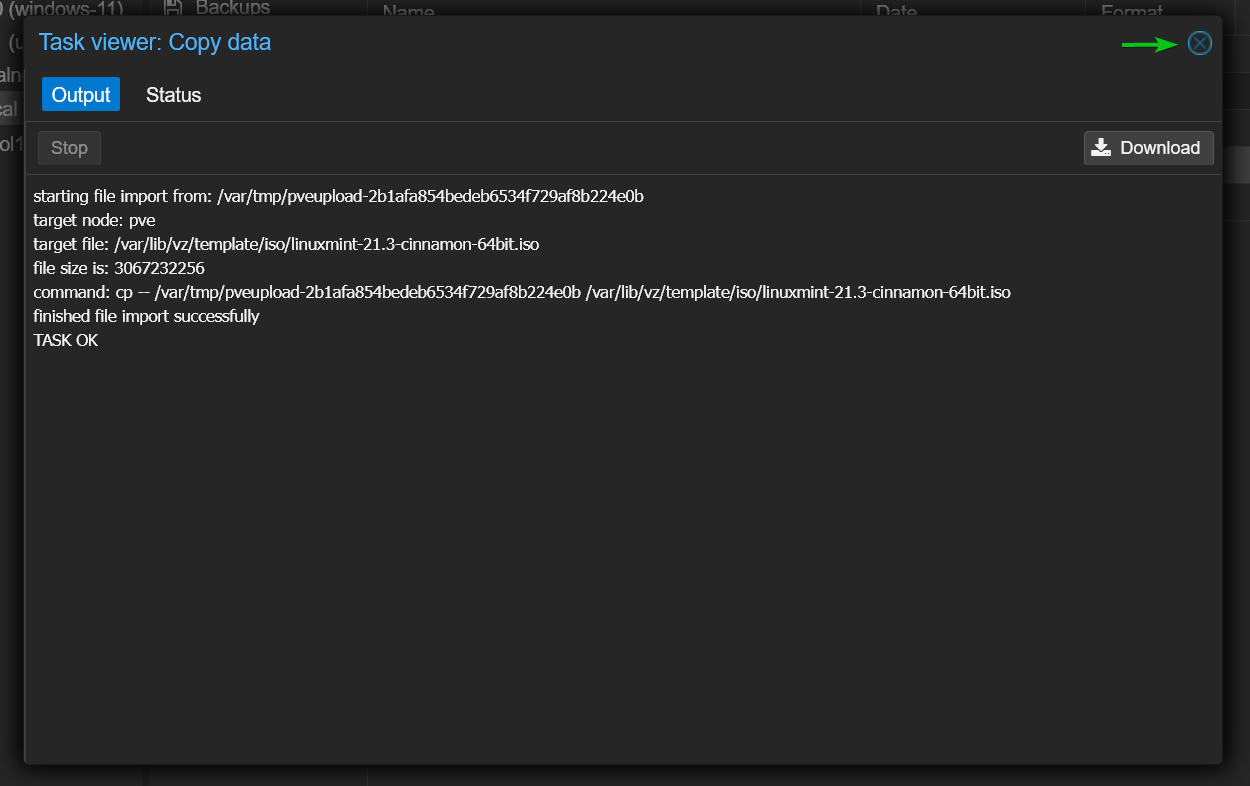
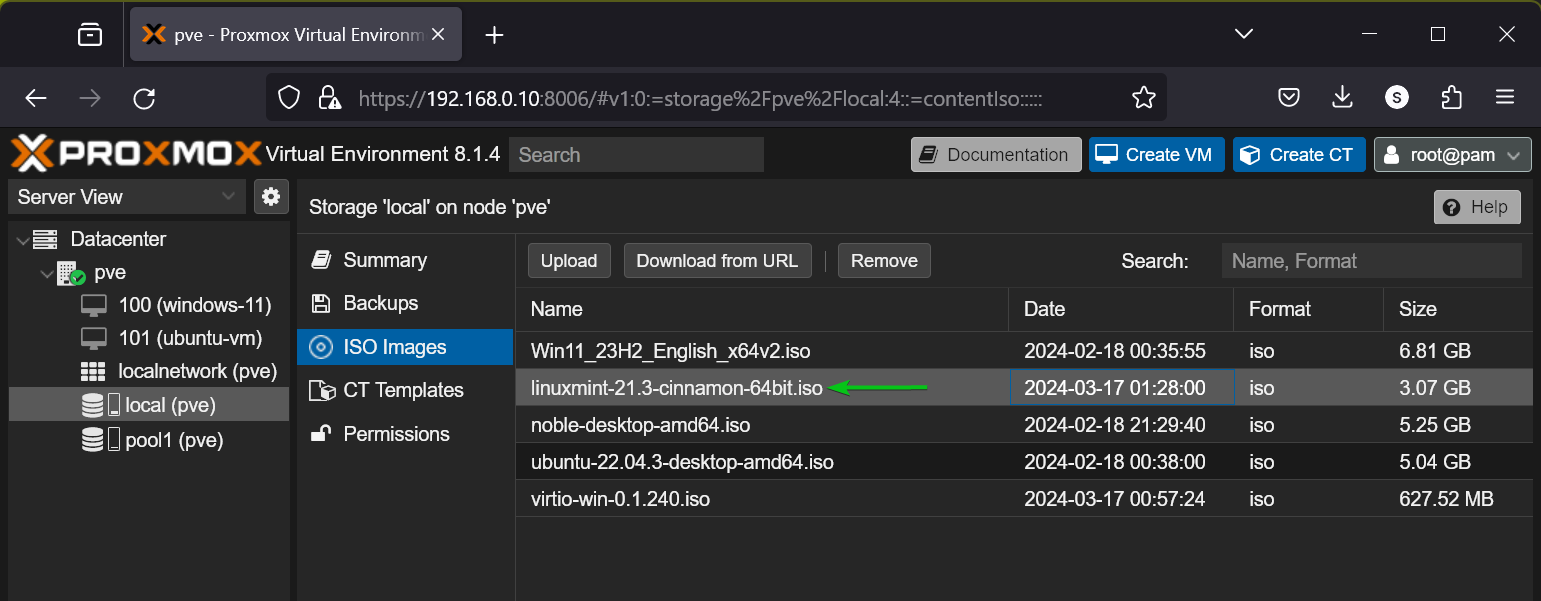
Your uploaded ISO image will now appear in the ISO Images section of your selected Proxmox VE storage.
Downloading an ISO Image on Proxmox VE Server using URL
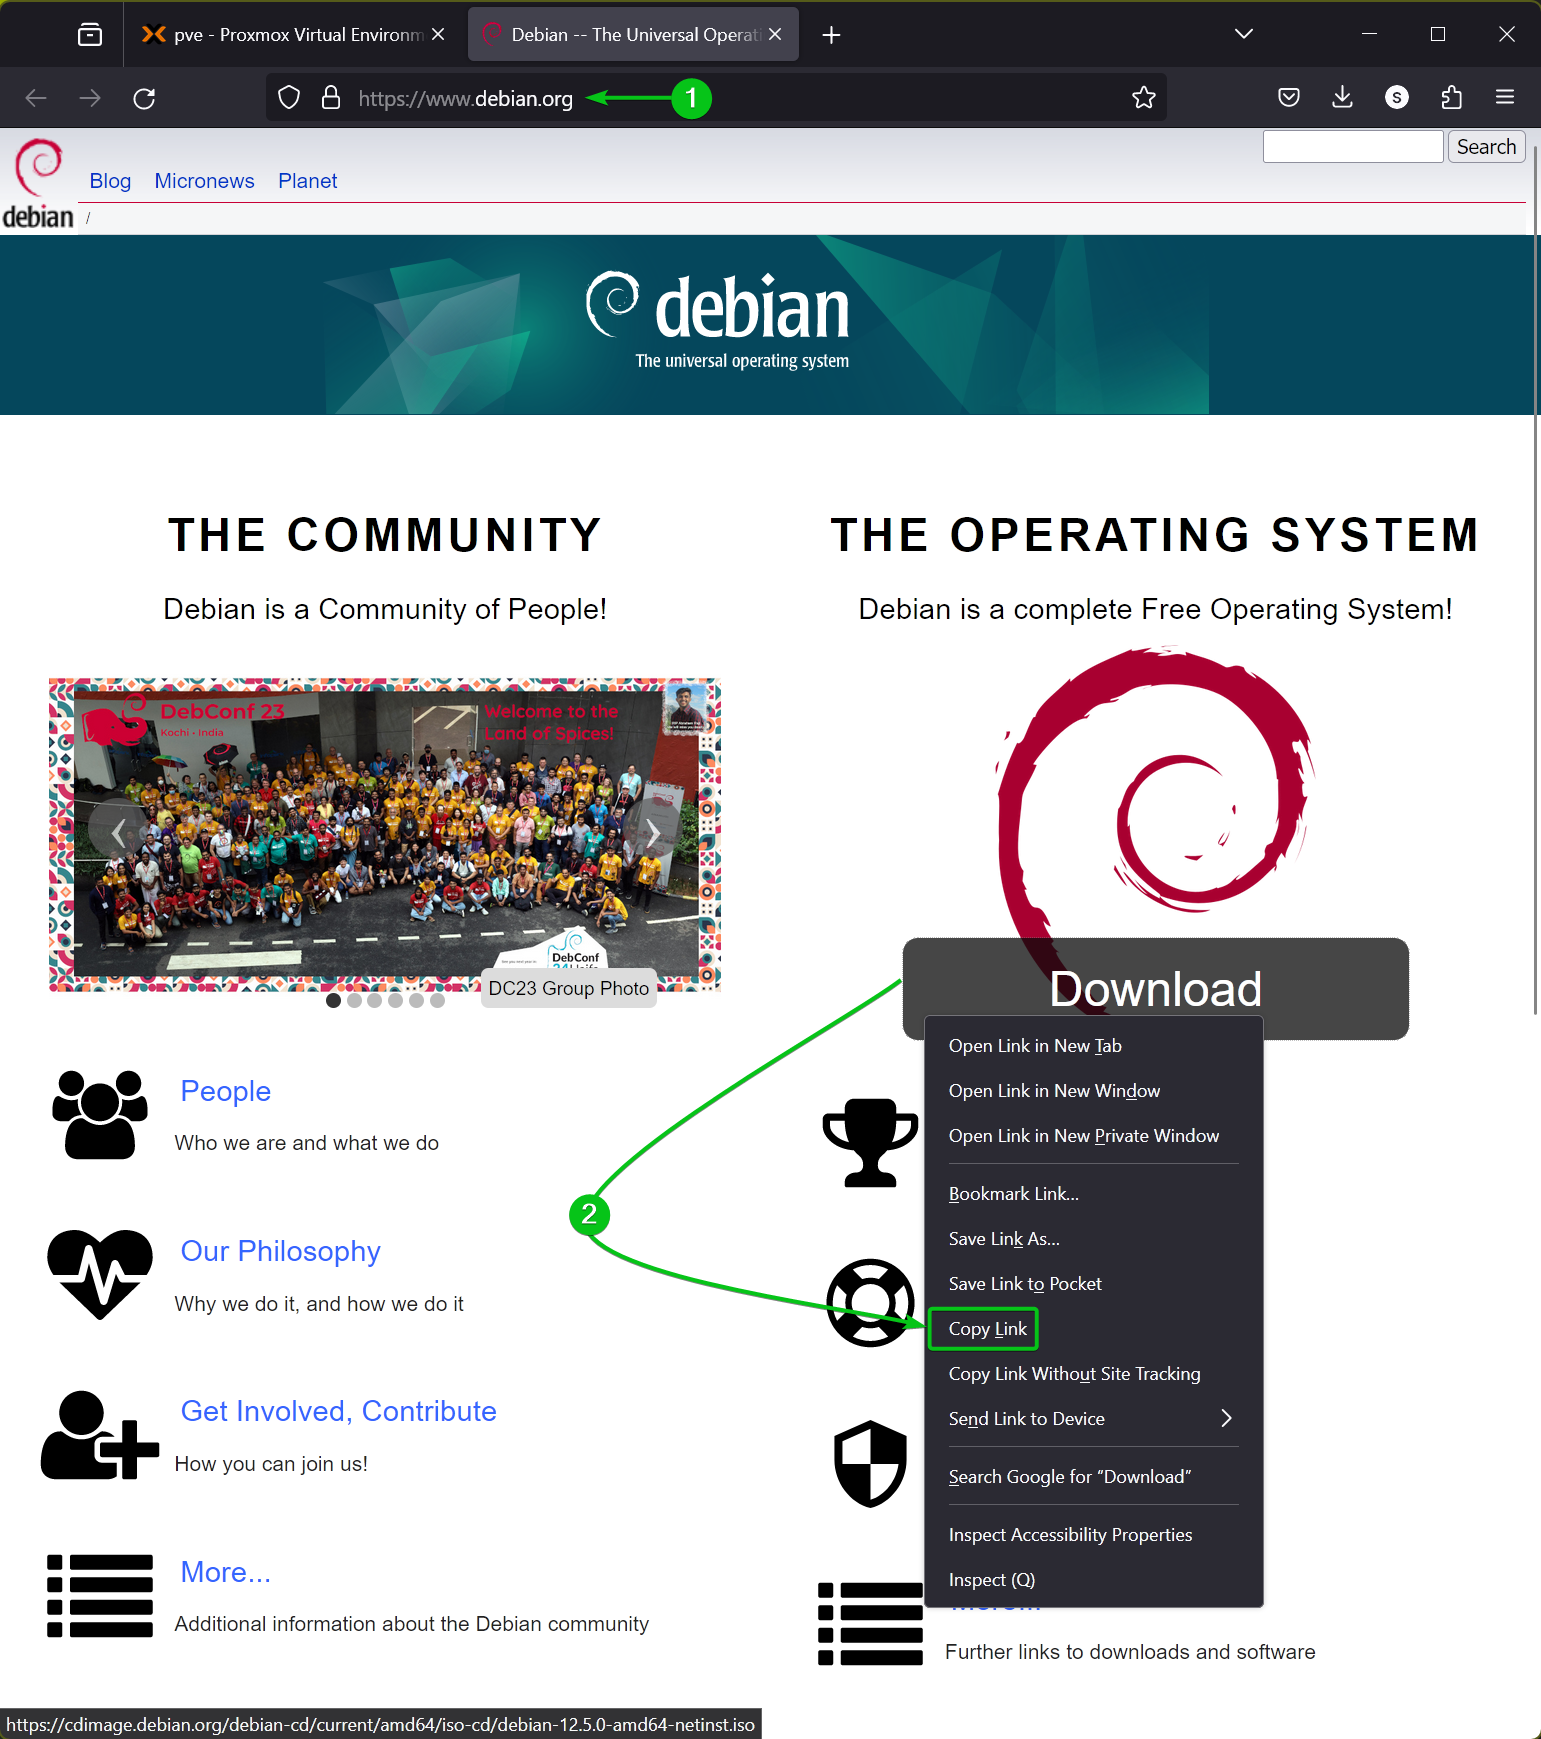
To download an ISO image directly on your Proxmox VE server, copy the download link from the official website of the operating system (e.g., Debian, Ubuntu).
For example, to download the ISO image of Debian 12:
- Visit the official Debian website.
- Right-click on Download and select Copy Link.
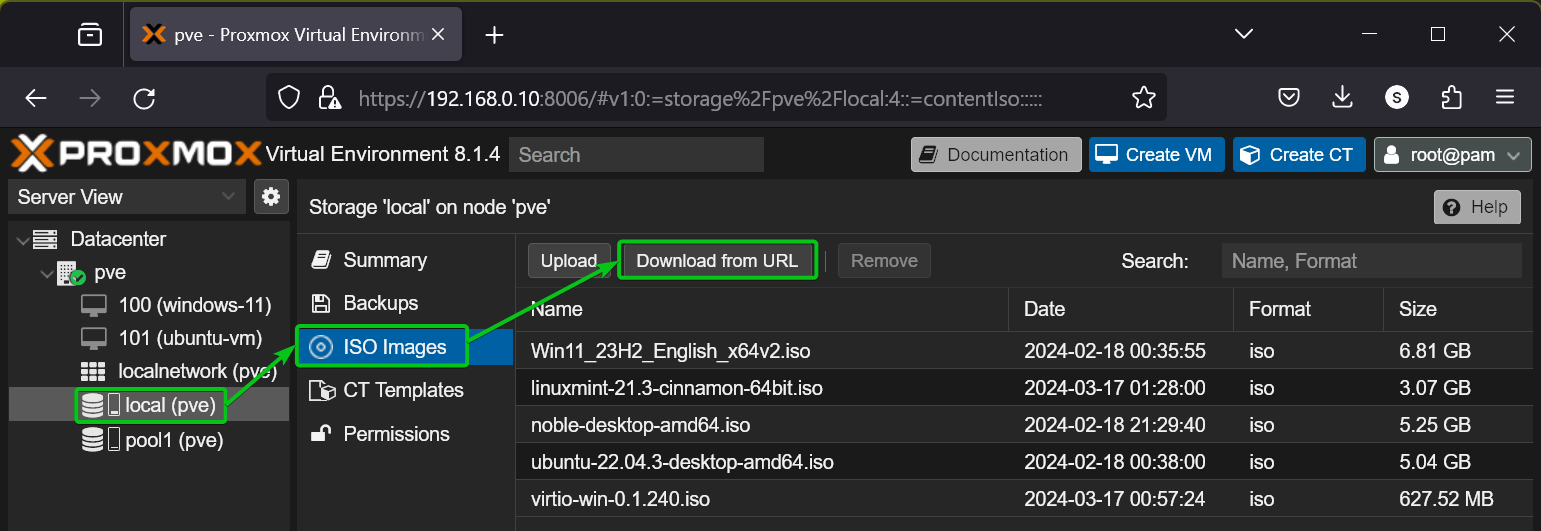
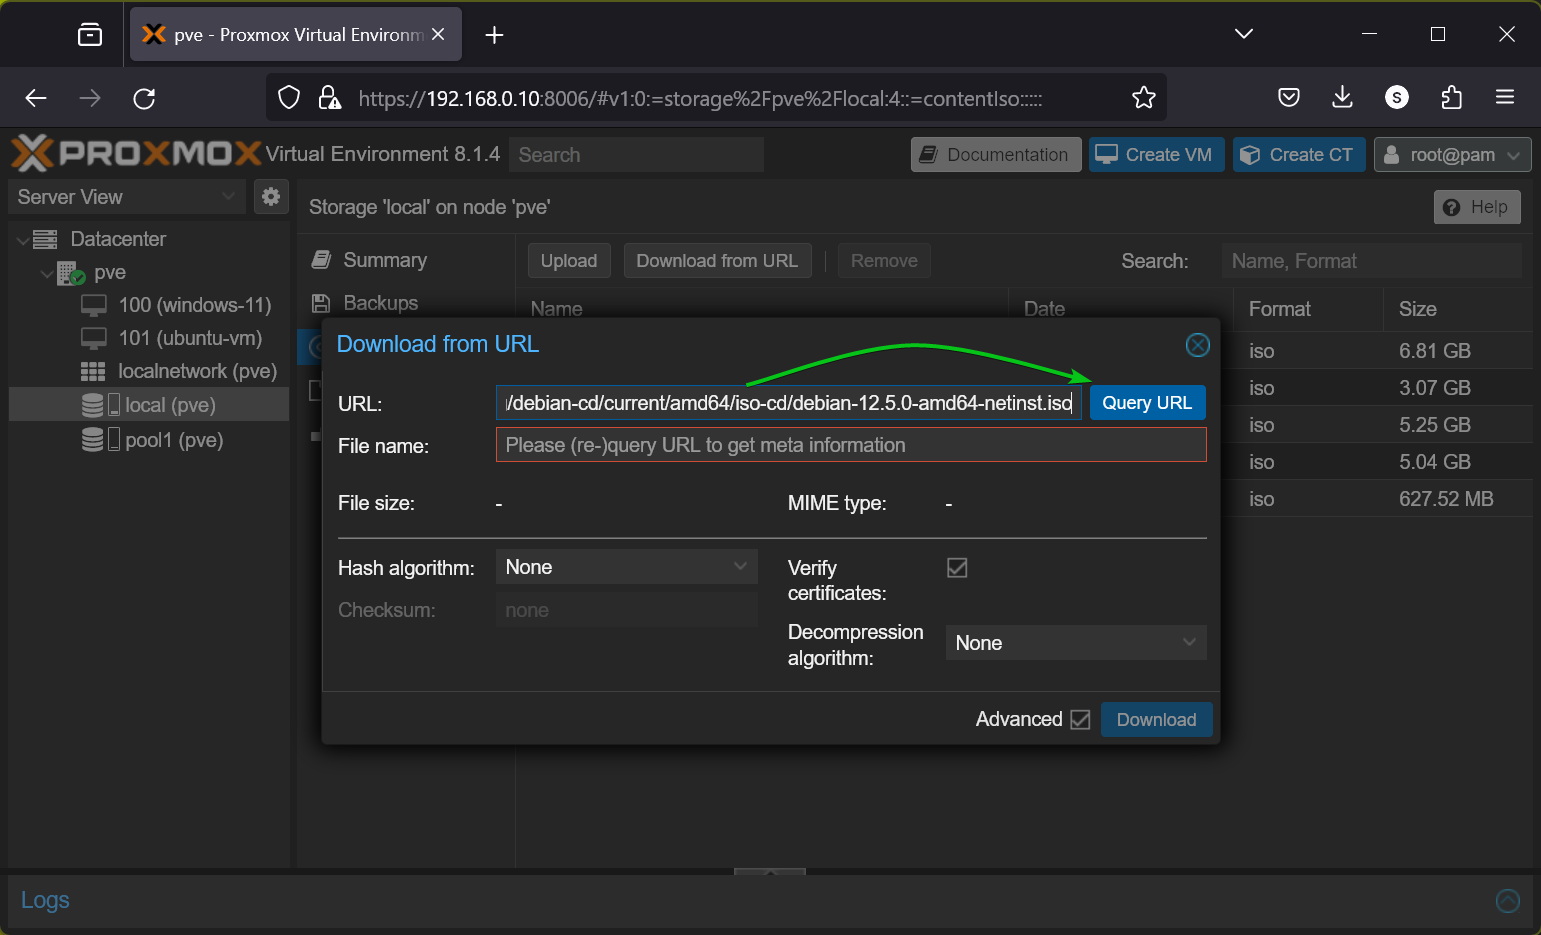
In Proxmox VE, navigate to the ISO Images section and click on Download from URL.
Paste the ISO image URL in the provided section, and click Query URL.
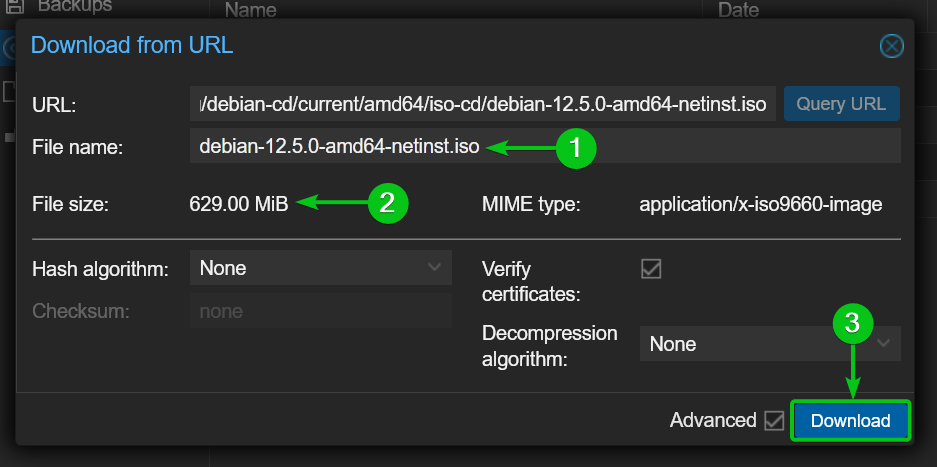
If the URL is valid, basic information like File name and File size will populate. You can rename it before proceeding. Click Download to start the download from the URL.
Proxmox VE will begin downloading the ISO image file, which may take a few moments to complete.
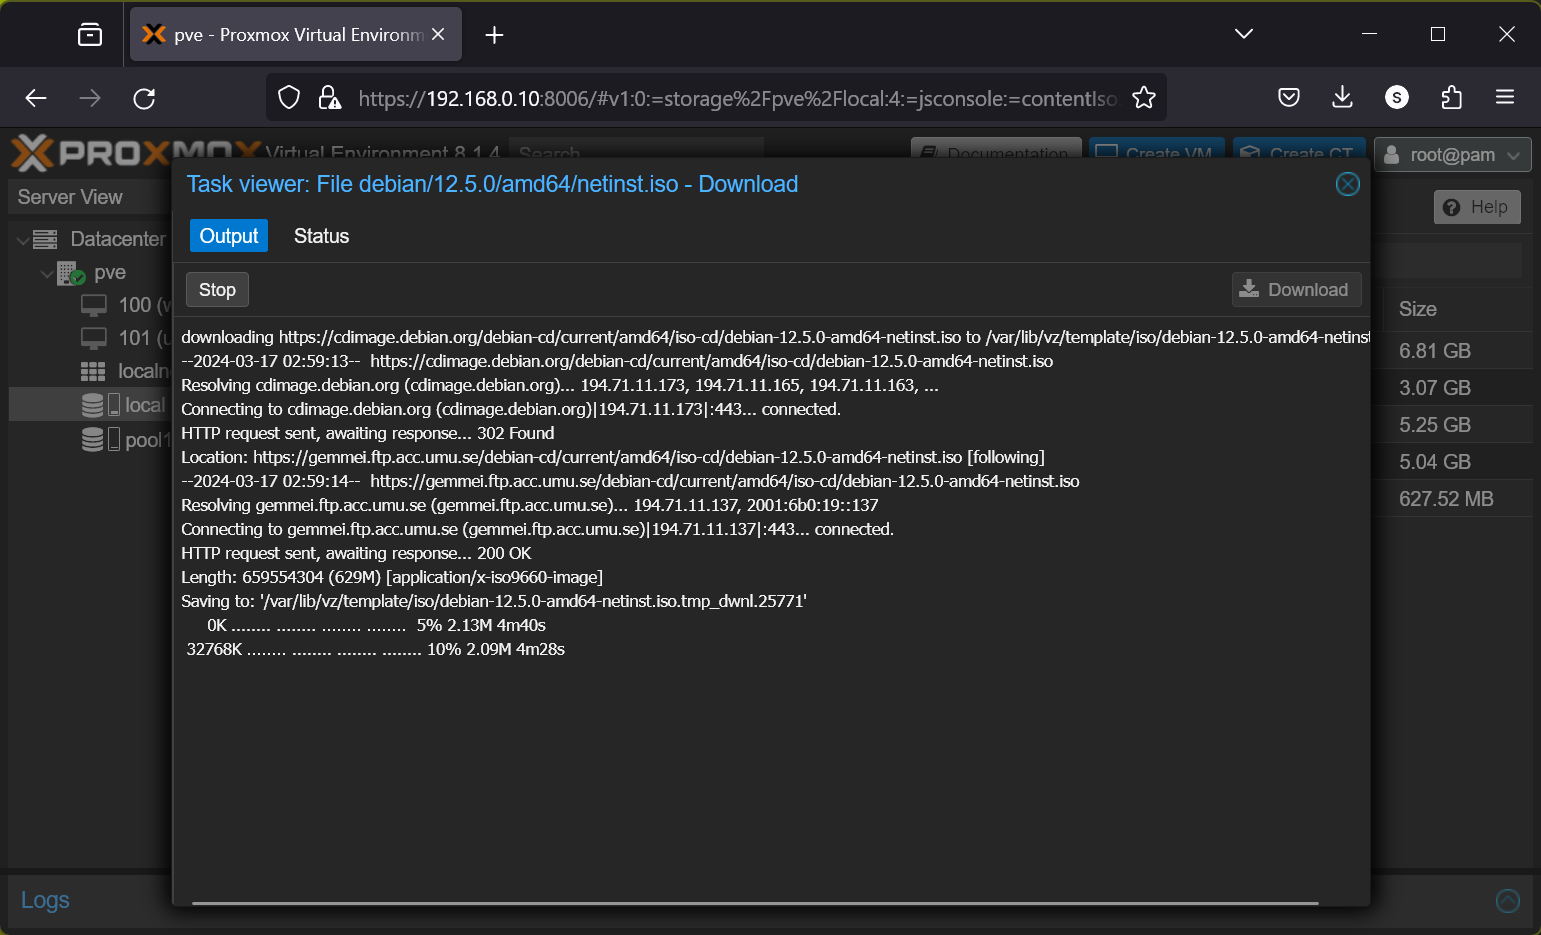
Upon completion, you’ll receive a confirmation message. Simply close the window to finish.

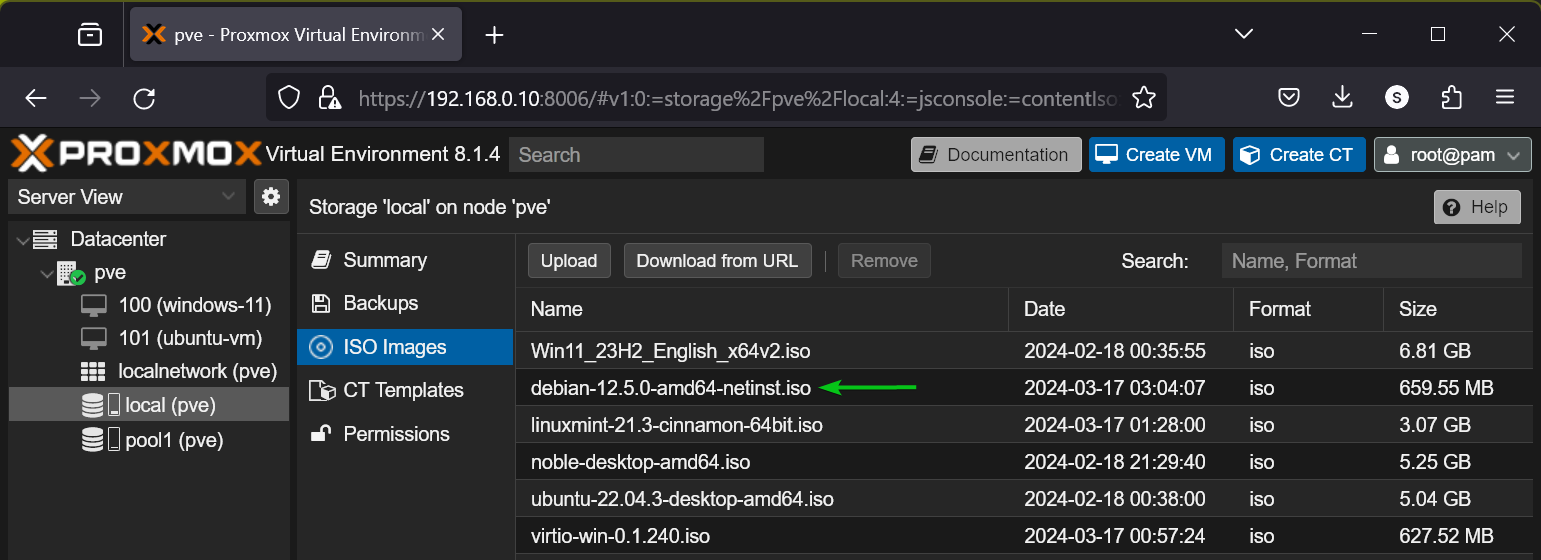
The downloaded ISO image file should now be in the ISO Images section of the selected Proxmox VE storage.
Conclusion
This guide has provided step-by-step instructions on how to upload an ISO image from your computer and download an ISO image using a URL directly to your Proxmox VE server. By understanding these processes, administrators can effectively manage their virtual machines and enhance their workflow.
FAQ
1. What is Proxmox VE?
Proxmox VE is an open-source virtualization management platform that allows users to manage virtual machines and containers efficiently.
2. How do I know if my ISO image is compatible with Proxmox VE?
Most modern Linux distributions are compatible, but you should always check the specific system requirements of the OS you’re planning to install.
3. Can I use other formats apart from ISO for my virtual machines?
No, Proxmox VE primarily uses ISO files for installing operating systems on virtual machines. Other formats may not be supported.