

Summary: In this article, I share my journey of transforming old hi-fi speakers into a Bluetooth speaker system using a Raspberry Pi 3, a Digital-to-Analog Converter (DAC), and a few DIY skills. This project not only revived forgotten audio hardware but also offered valuable insights into sound technology, all at little cost. Perfect for DIY enthusiasts and tech lovers!
Transforming Old Speakers into Bluetooth Speakers
Sometimes, creativity strikes in the most unexpected ways. With an old pair of hi-fi speakers gathering dust, I set out to convert them into Bluetooth speakers. Armed with a Raspberry Pi 3, a DAC, and some DIY spirit, I aimed to elevate my sound experience without spending a fortune.
Essential Components for the Project
For this project, I gathered a mix of new and repurposed components:
Hi-Fi Speakers: The foundational elements of my project—two vintage hi-fi speakers that had potential yet lay unused for years.
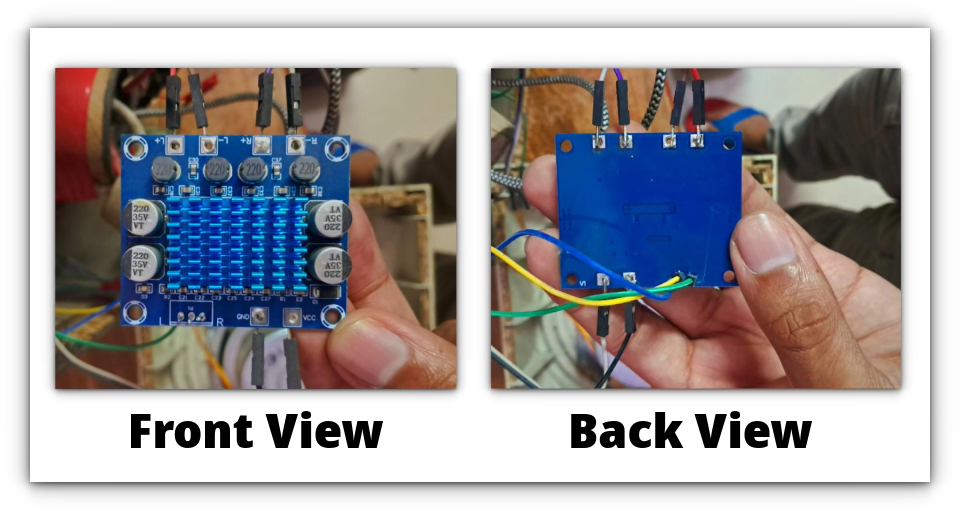
DAC Chipset: A Digital-to-Analog Converter was crucial for audio output, supporting a 3.5mm input while providing stereo output.
Soldering Iron: Essential for wiring up the speakers to the DAC. My initial attempts at soldering were challenging, but I managed to get the job done.
12V Power Supply: A 12V 2A adapter powered the DAC, ensuring compatibility for efficient operation. Make sure your supply matches the DAC’s specs.
3.5mm Audio Cable: Used to link the DAC’s output to the Raspberry Pi’s audio jack.
Raspberry Pi 3: I utilized an old Raspberry Pi 3 for Bluetooth functionality. Any model with a 3.5mm jack suffices for this project.
Connecting the DAC to the Speakers
My DAC lacked easy connectors, so I had to learn soldering. After some online tutorials, I felt ready to connect the speaker wires to the DAC. Although the process was tricky, perseverance led to effective bonding of the wires.
Integrating Bluetooth Functionality with Raspberry Pi
To turn my Raspberry Pi into a Bluetooth audio receiver, I followed a simple GitHub project. This resource provides a script that simplifies the setup process significantly.
Downloading the Installation Script
I retrieved the script using the command:
wget https://raw.githubusercontent.com/nicokaiser/rpi-audio-receiver/main/install.shRunning the Script
Execute the installation with:
bash install.shThe installation process is intuitive, guiding you through setting a hostname, Bluetooth configuration, and options like AirPlay 2 and Spotify Connect.
Testing the DIY Bluetooth Speakers
With everything connected and configured, it was time to test the setup. I paired my smartphone with the Raspberry Pi. The audio quality exceeded expectations, delivering clear and robust sound through the revived hi-fi speakers.
Performance Evaluation
- Audio Quality: Excellent clarity with no distortion.
- Bluetooth Range: Stable connectivity throughout my space.
- Responsiveness: Minimal lag during playback, whether streaming or using Spotify Connect.
Conclusion
This DIY project was a delightful challenge combining technical know-how with creativity. Reviving old hi-fi speakers with a Raspberry Pi and a DAC proved to be a fulfilling experience, making music enjoyable again while being cost-effective.
If you have antiquated speakers lying around, consider giving this project a try. The satisfaction of breathing new life into old technology is worth the effort!
Frequently Asked Questions
1. Can I use any Raspberry Pi model for this project?
Yes, any Raspberry Pi model with a 3.5mm audio jack will work, though newer models may require some additional configuration.
2. What if I don’t have a soldering iron?
If soldering isn’t an option, consider using connectors or jumper wires that are compatible with your DAC and speakers.
3. Is the setup complicated for beginners?
Not at all! The provided scripts guide you through the process, making it accessible even for newcomers to DIY electronics.